
Introduction
BuyVM1 is a relatively cheap VPS company based in Canada (but, unfortunately, it does not offer any hosting outside of Canada). Their only downside is that they have minimal stock that gets refilled daily. The easiest way to obtain one is by visiting this Website and joining the Discord server or polling the stock API hourly.
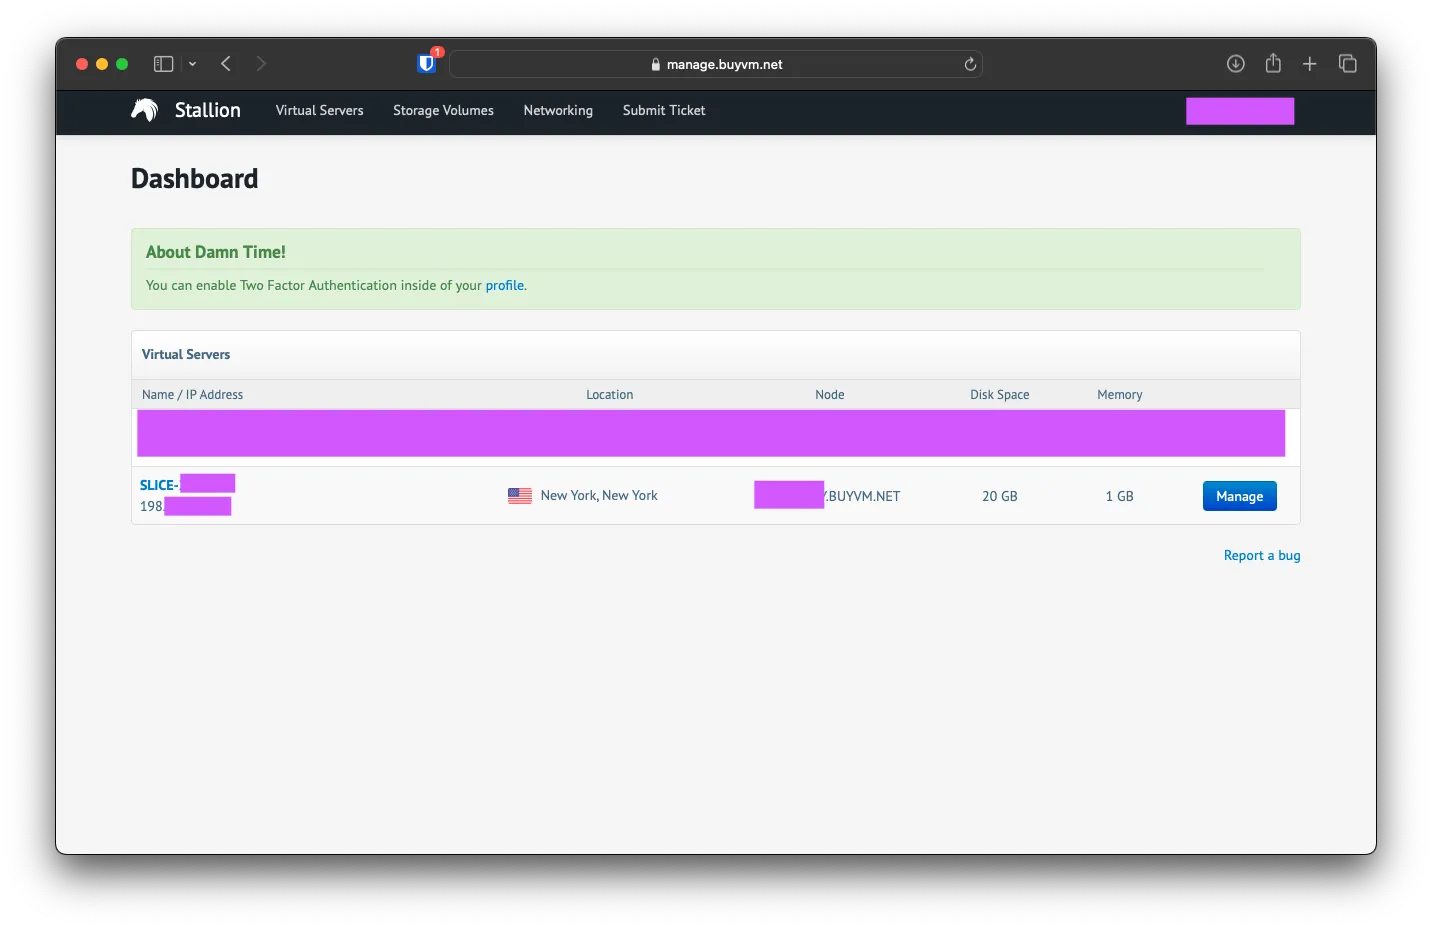
VM Dashboard
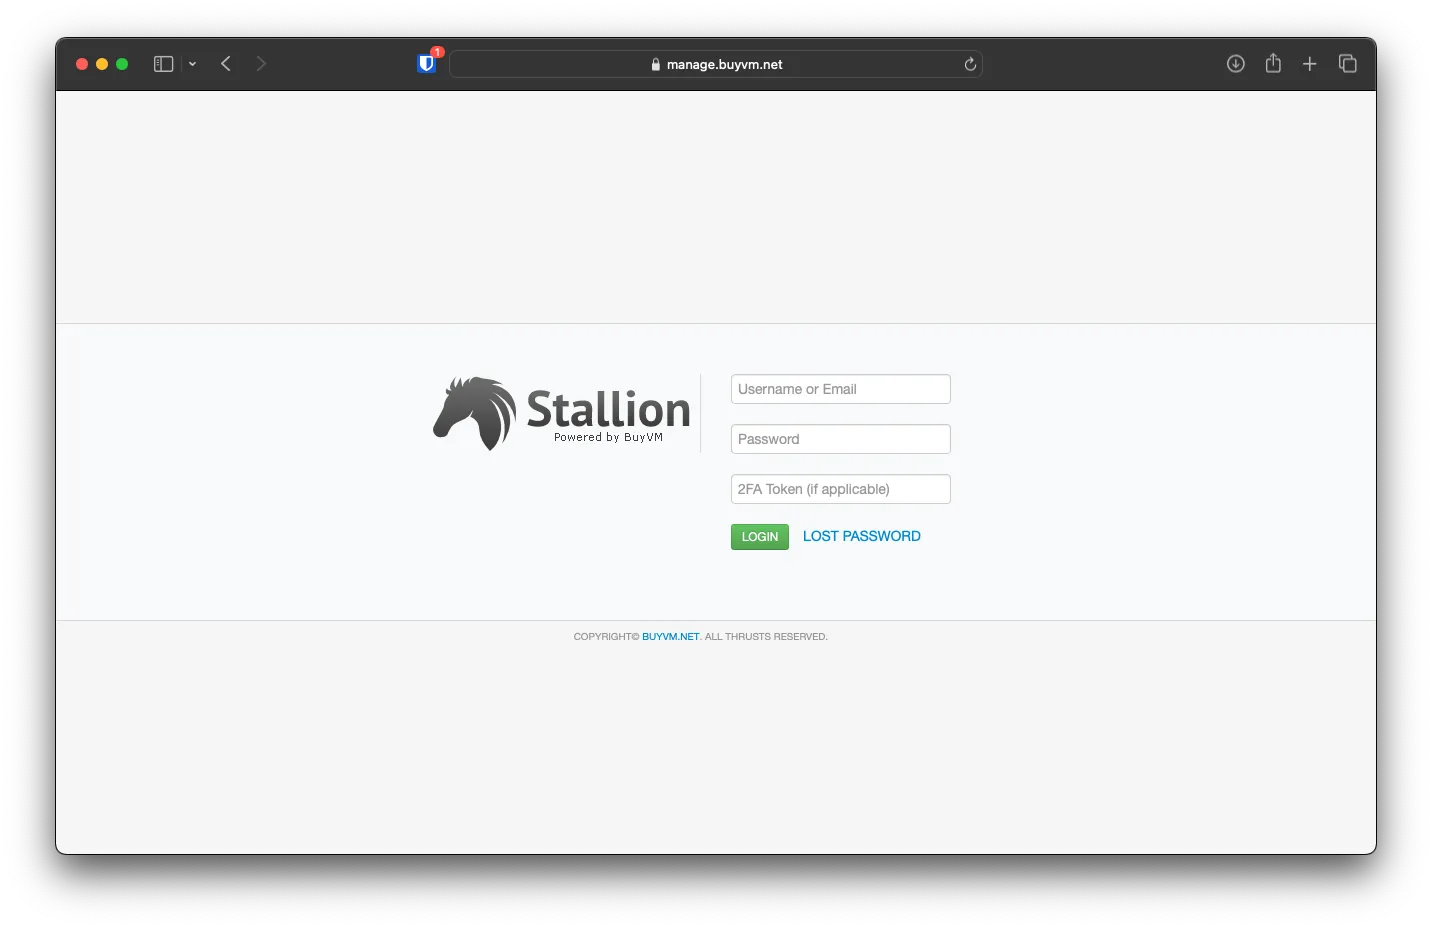
The initial setup is pretty straightforward. When you purchase the VM, you can select the OS you would like the VM to come with, but in my case, I will be reimaging it with Ubuntu 22.04. On the initial purchase email, you will get a link to Stallion. This is their management portal where you can control the VM and reimage it.
After logging into the portal, you will be on the Dashboard with all your VMs listed. In my case, I will be using the New York, New York VM.
VM Reinstall Ubuntu 20.04
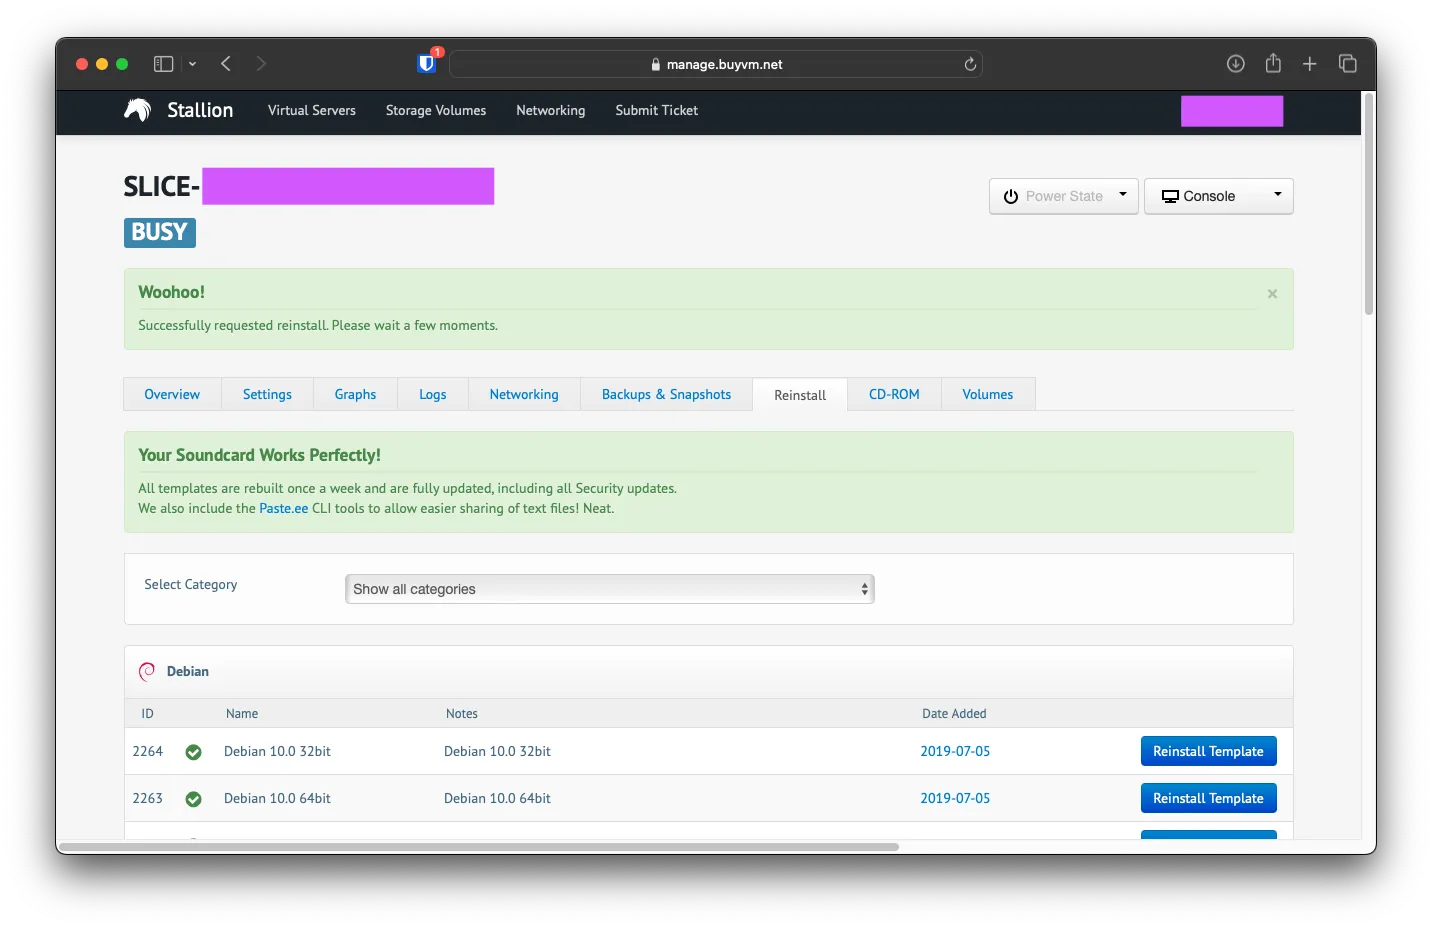
Click on the VM to be brought to the VM management page, and there, click on Reinstall Filter by Ubuntu (7).
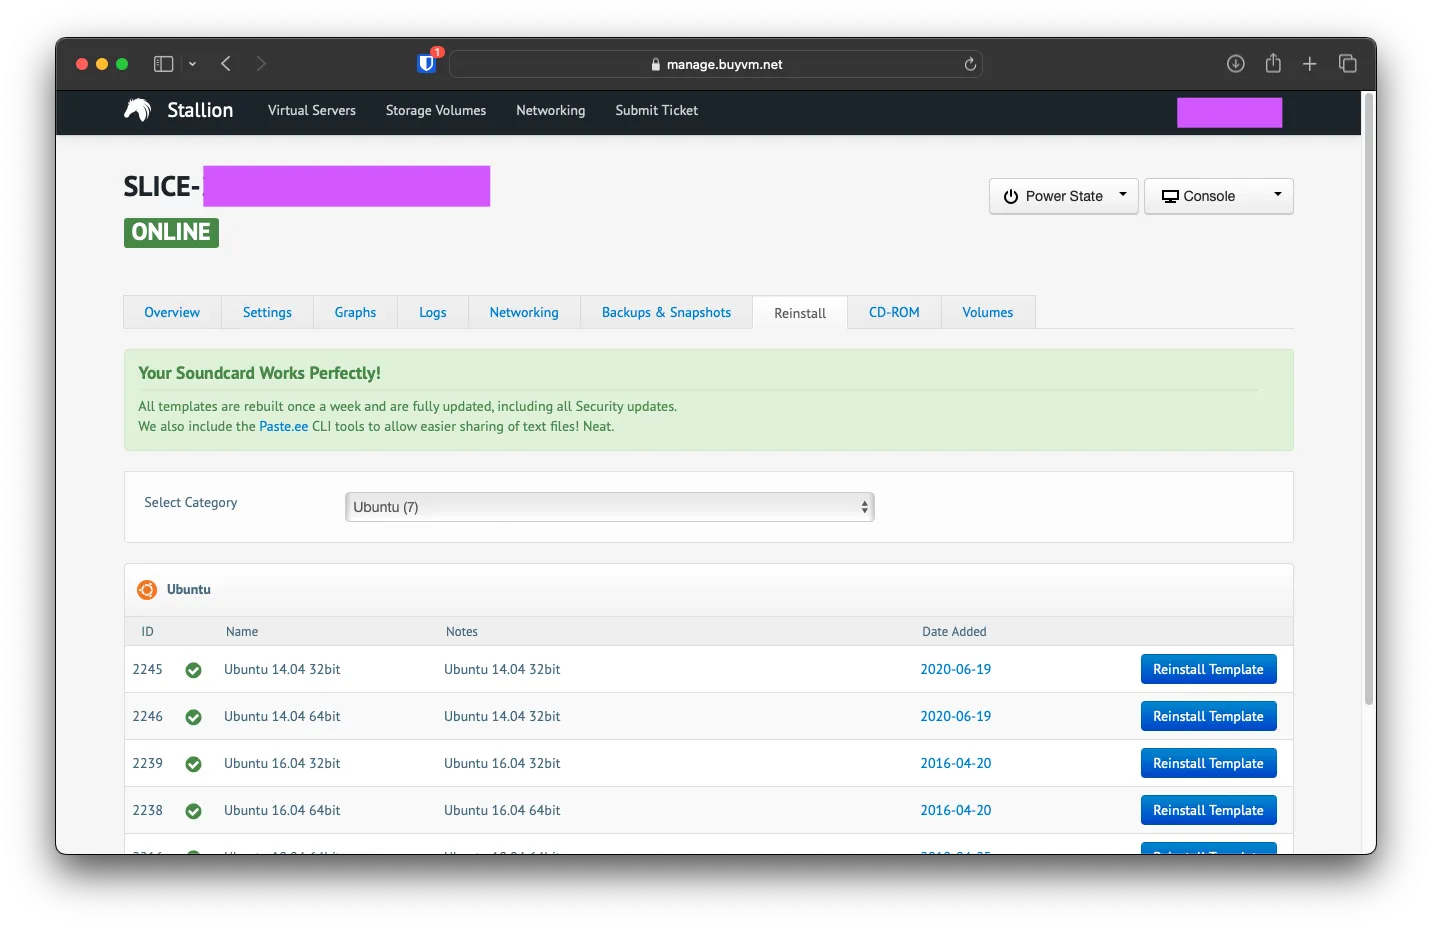
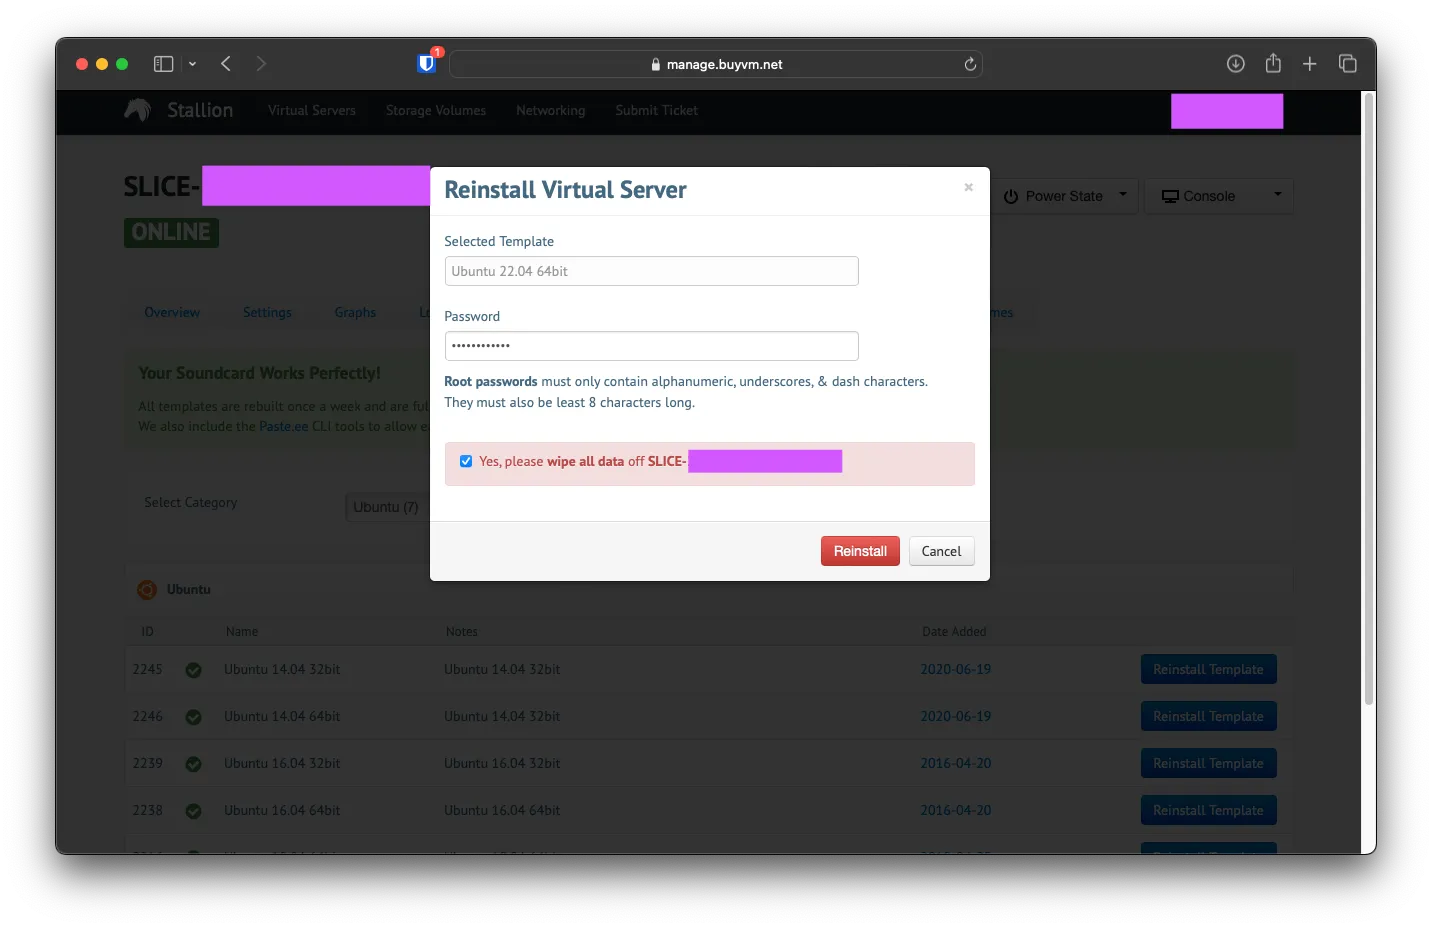
Then you can choose 6378 Ubuntu 22.04 64bit and click Reinstall Template. On the popup, select a new Root Password and click on Reinstall.
You will get a success message, and the server will go into Busy after a few minutes. It will come to Online again
SSH’ing into the VM
After it is online, you can SSH into the VM with Putty if you are on Windows or a terminal on Mac OS X SSH root@IPADDRESS:22
You should see the following in the console
Welcome to Ubuntu 22.04 LTS (GNU/Linux 5.15.0-25-generic x86_64)

 * Documentation:  https://help.ubuntu.com
 * Management:     https://landscape.canonical.com
 * Support:        https://ubuntu.com/advantage

  System information as of Thu Nov  2 12:46:27 AM UTC 2023

  System load:  0.0               Processes:             84
  Usage of /:   7.0% of 19.59GB   Users logged in:       0
  Memory usage: 15%               IPv4 address for eth0: xxx.xxx.xxx.xxx
  Swap usage:   0%

root@localhost:~#
Upgrading Ubuntu 20.04
From there, the best practice is to run apt-get update && apt-get upgrade to install the latest security patches.
root@localhost:~# apt-get update
Hit:1 http://us.archive.ubuntu.com/ubuntu jammy InRelease
Get:2 http://us.archive.ubuntu.com/ubuntu jammy-updates InRelease [119 kB]
Get:3 http://us.archive.ubuntu.com/ubuntu jammy-backports InRelease [109 kB]
Get:4 http://us.archive.ubuntu.com/ubuntu jammy-security InRelease [110 kB]
Get:5 http://us.archive.ubuntu.com/ubuntu jammy-updates/main amd64 Packages [1,148 kB]
Get:6 http://us.archive.ubuntu.com/ubuntu jammy-updates/main Translation-en [245 kB]

...

Get:32 http://us.archive.ubuntu.com/ubuntu jammy-security/multiverse amd64 Packages [36.5 kB]
Get:33 http://us.archive.ubuntu.com/ubuntu jammy-security/multiverse Translation-en [7,060 B]
Get:34 http://us.archive.ubuntu.com/ubuntu jammy-security/multiverse amd64 c-n-f Metadata [260 B]
Fetched 7,838 kB in 2s (5,140 kB/s)
Reading package lists... Done
root@localhost:~#
With the update command, you will need to confirm the space required.
root@localhost:~# apt-get upgrade
Reading package lists... Done
Building dependency tree... Done
Reading state information... Done
Calculating upgrade... Done
The following packages were automatically installed and are no longer required:
  eatmydata libeatmydata1 libflashrom1 libftdi1-2 python-babel-localedata python3-babel
  python3-certifi python3-chardet python3-jinja2 python3-json-pointer python3-jsonpatch
  python3-jsonschema python3-markupsafe python3-pyrsistent python3-requests python3-tz
  python3-urllib3
Use 'apt autoremove' to remove them.
The following packages have been kept back:
  libudev1 linux-image-generic sosreport udev
The following packages will be upgraded:
  amd64-microcode apparmor apport apt apt-utils base-files binutils binutils-common
  binutils-x86-64-linux-gnu ca-certificates cryptsetup cryptsetup-bin cryptsetup-initramfs
  curl dbus dbus-user-session dirmngr distro-info distro-info-data dmidecode dpkg e2fsprogs
  file firmware-sof-signed fwupd fwupd-signed gawk gcc-12-base gnupg gnupg-l10n gnupg-utils

  ...

    ubuntu-drivers-common ubuntu-minimal ufw vim vim-common vim-runtime vim-tiny wireless-regdb
  xxd zlib1g
200 upgraded, 0 newly installed, 0 to remove and 4 not upgraded.
112 standard security updates
Need to get 352 MB of archives.
After this operation, 148 MB of additional disk space will be used.
Do you want to continue? [Y/n]
Here, you can enter Y and click enter; it might take a couple of minutes to finish updating.
done.
Processing triggers for initramfs-tools (0.140ubuntu13.4) ...
update-initramfs: Generating /boot/initrd.img-5.15.0-25-generic
Scanning processes...
Scanning candidates...
Scanning linux images...

Running kernel seems to be up-to-date.

Restarting services...
 /etc/needrestart/restart.d/systemd-manager
 systemctl restart cron.service packagekit.service polkit.service systemd-udevd.service udisks2.service
Service restarts being deferred:
 /etc/needrestart/restart.d/dbus.service
 systemctl restart getty@tty1.service
 systemctl restart systemd-logind.service
 systemctl restart user@0.service

No containers need to be restarted.

No user sessions are running outdated binaries.

No VM guests are running outdated hypervisor (qemu) binaries on this host.
root@localhost:~#
Back on the console, IPv4 is preconfigured already. In the next part, we will set up an IPv6 address on the management dashboard and then add it to the VM.
If you try to ping an IPv4 address, it will connect, but with an IPv6, it will say, Network is unreachable.
root@localhost:~# ping 8.8.8.8
PING 8.8.8.8 (8.8.8.8) 56(84) bytes of data.
64 bytes from 8.8.8.8: icmp_seq=1 ttl=117 time=3.02 ms
64 bytes from 8.8.8.8: icmp_seq=2 ttl=117 time=2.32 ms
64 bytes from 8.8.8.8: icmp_seq=3 ttl=117 time=2.20 ms
64 bytes from 8.8.8.8: icmp_seq=4 ttl=117 time=2.29 ms
64 bytes from 8.8.8.8: icmp_seq=5 ttl=117 time=2.23 ms
64 bytes from 8.8.8.8: icmp_seq=6 ttl=117 time=2.25 ms
64 bytes from 8.8.8.8: icmp_seq=7 ttl=117 time=2.29 ms
64 bytes from 8.8.8.8: icmp_seq=8 ttl=117 time=2.30 ms
^C
--- 8.8.8.8 ping statistics ---
8 packets transmitted, 8 received, 0% packet loss, time 7011ms
rtt min/avg/max/mdev = 2.199/2.360/3.017/0.250 ms
root@localhost:~# ping6 2001:4860:4860::8888
ping6: connect: Network is unreachable
root@localhost:~#
Creating an IPv6 Address
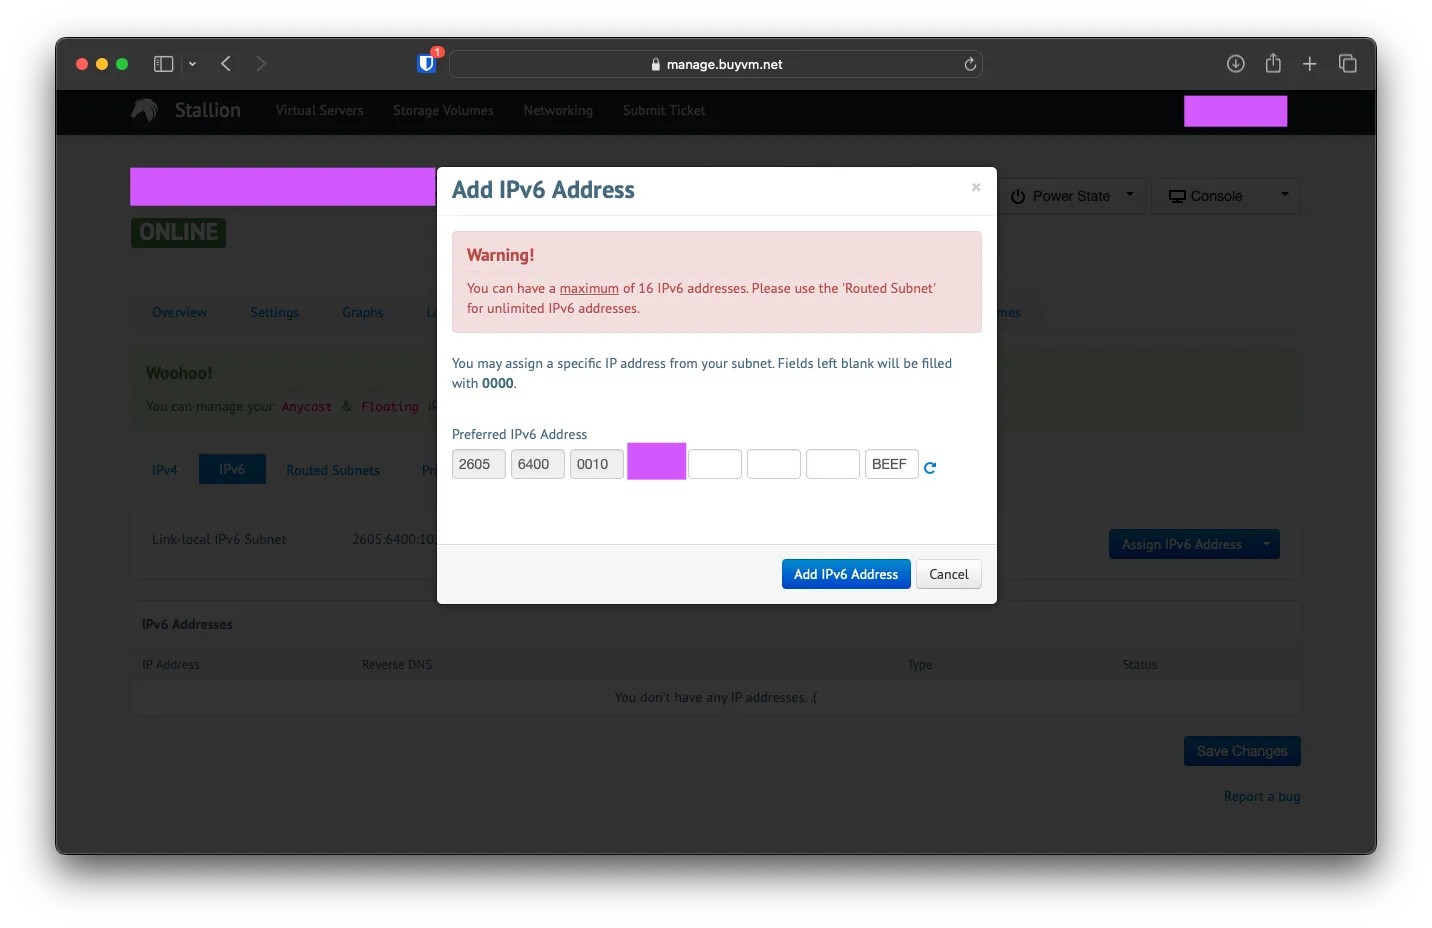
Back on Stallian go to Netowrking -> IPv6 then click on Assign IPv6 Address2
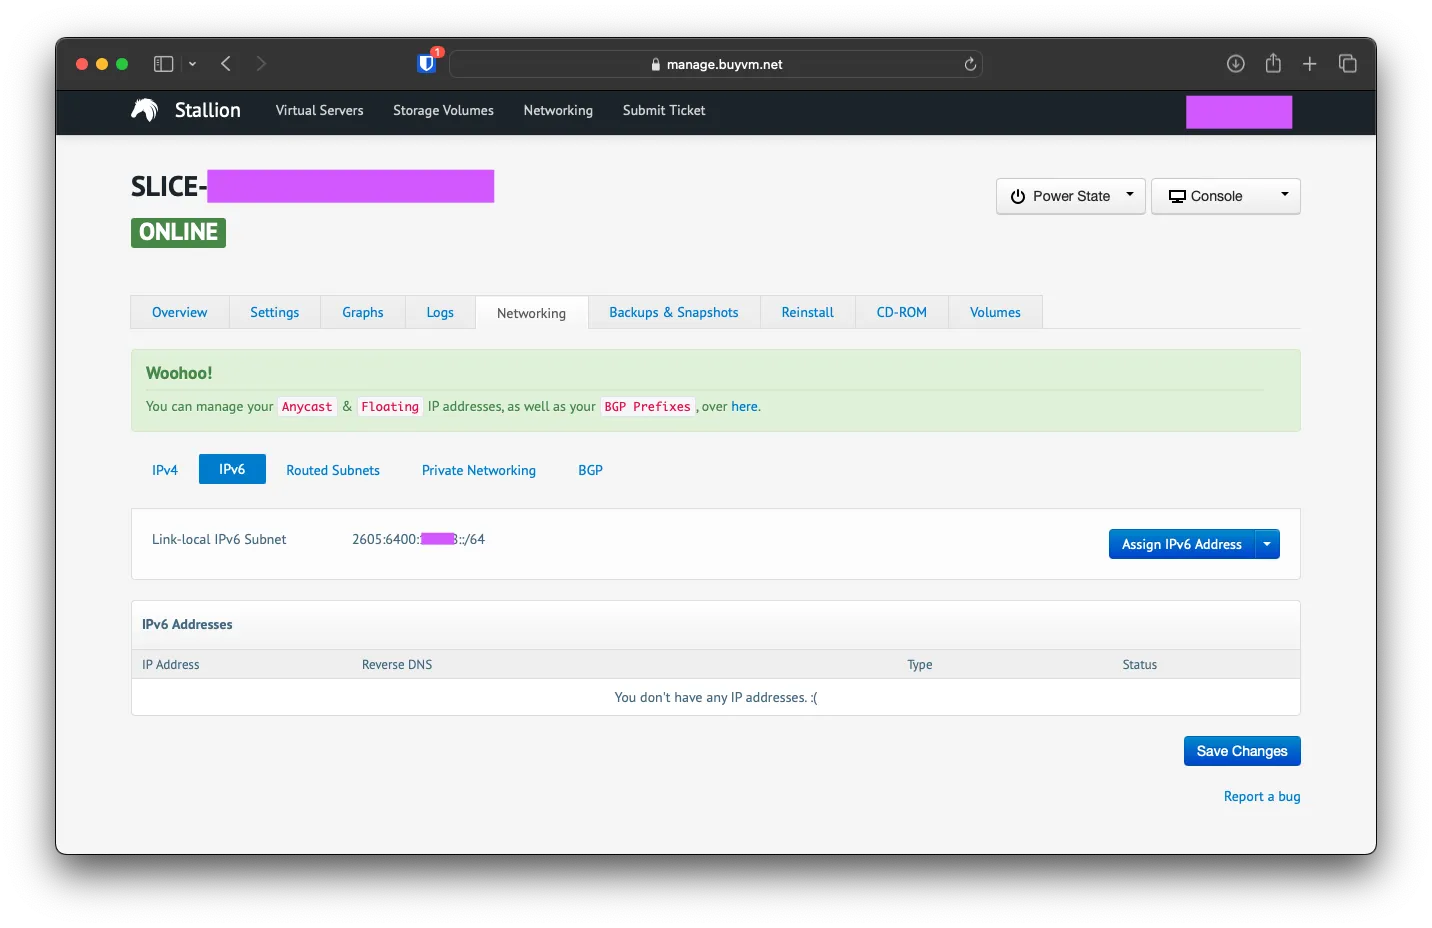
You can fill out the last four boxes with valid Hex Digits, but with IPv6, you can skip all but the last box and put a single character or, in my case, BEEF. After that, click on Add IPv6 Address
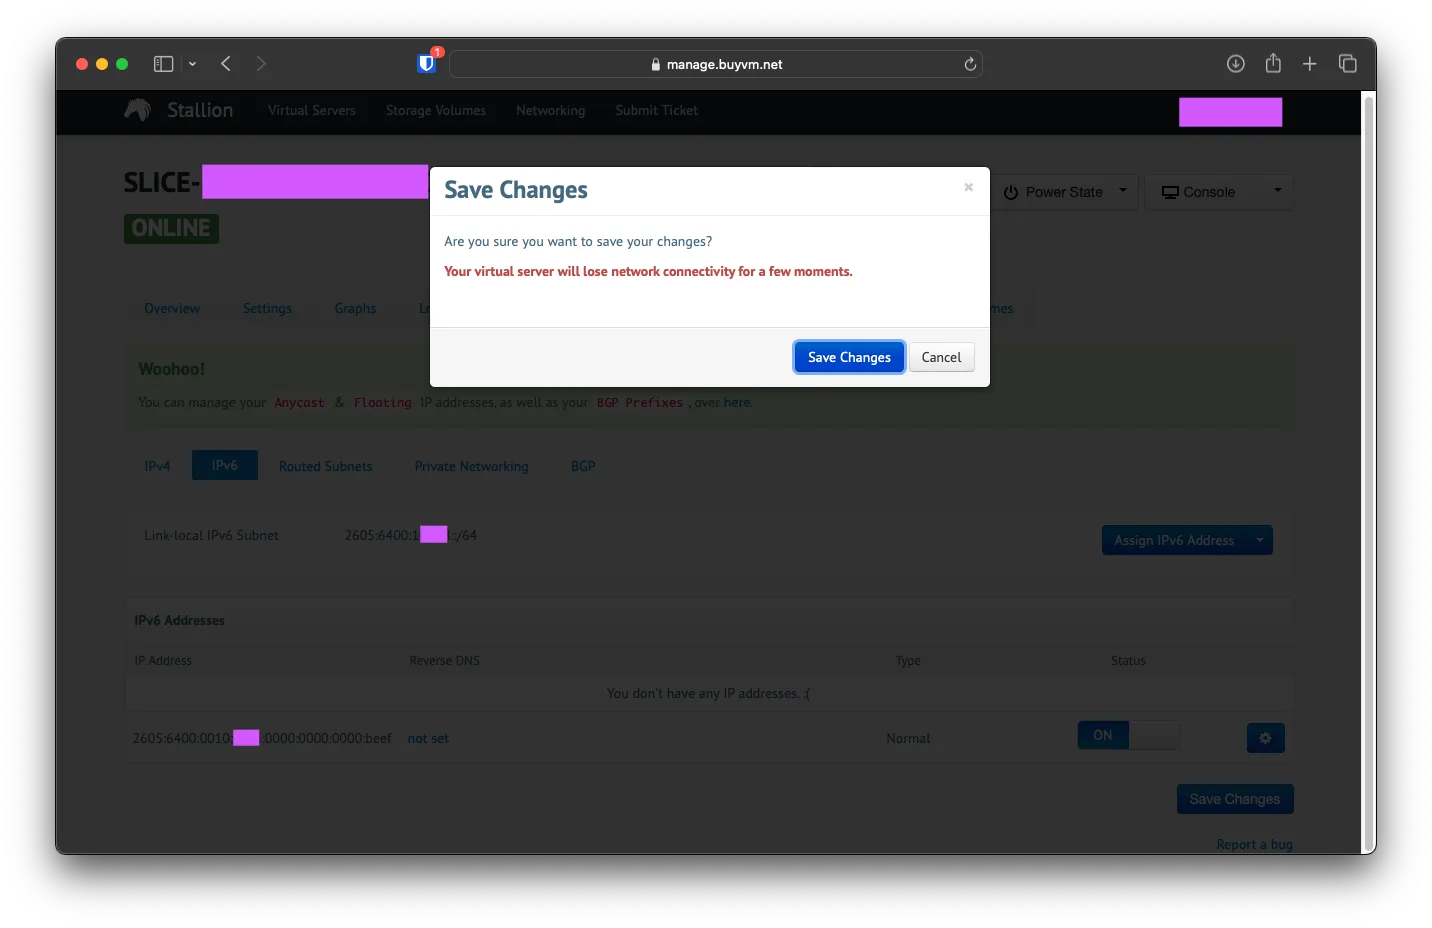
To enable the IPv6 Address for your VM, you will need to toggle the Status switch, then click on Save Changes.
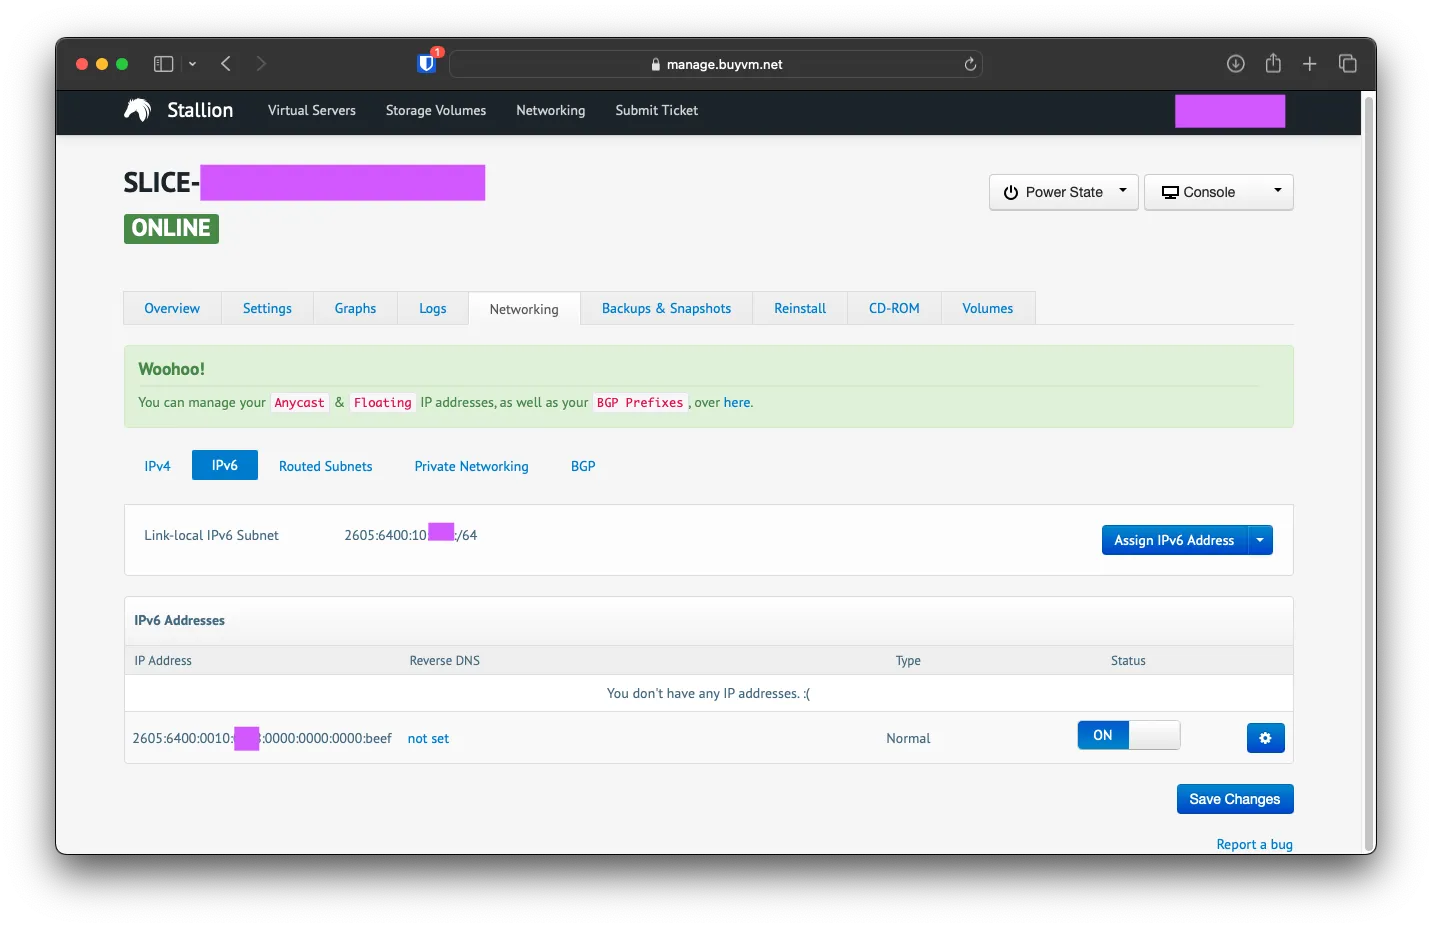
Click on Save Changes once again on the popup
After enabling the IPv6, it’s a good idea to power cycle your VM with the button on top Power State -> Gracefully Restart -> Restart.
Assinging Static IPv4/6
On the VM, after rebooting, reconnect with SSH and modify the file /etc/netplan/01-netcfg.yaml. Currently, in the file, it will have this
network:
  version: 2
  ethernets:
    eth0:
      dhcp4: true
Modify it to be like this, but filled with your IPs
network:
version: 2
ethernets:
eth0:
dhcp4: no
dhcp6: no
addresses:
- 192.98.xxx.xxx/24
- 2605:6400:10:xxxx::beef/48
routes:
- to: default
via: 198.98.xxx.xxx
- to: default
via: 2605:6400:xxxx::1
nameservers:
addresses:
- 8.8.8.8
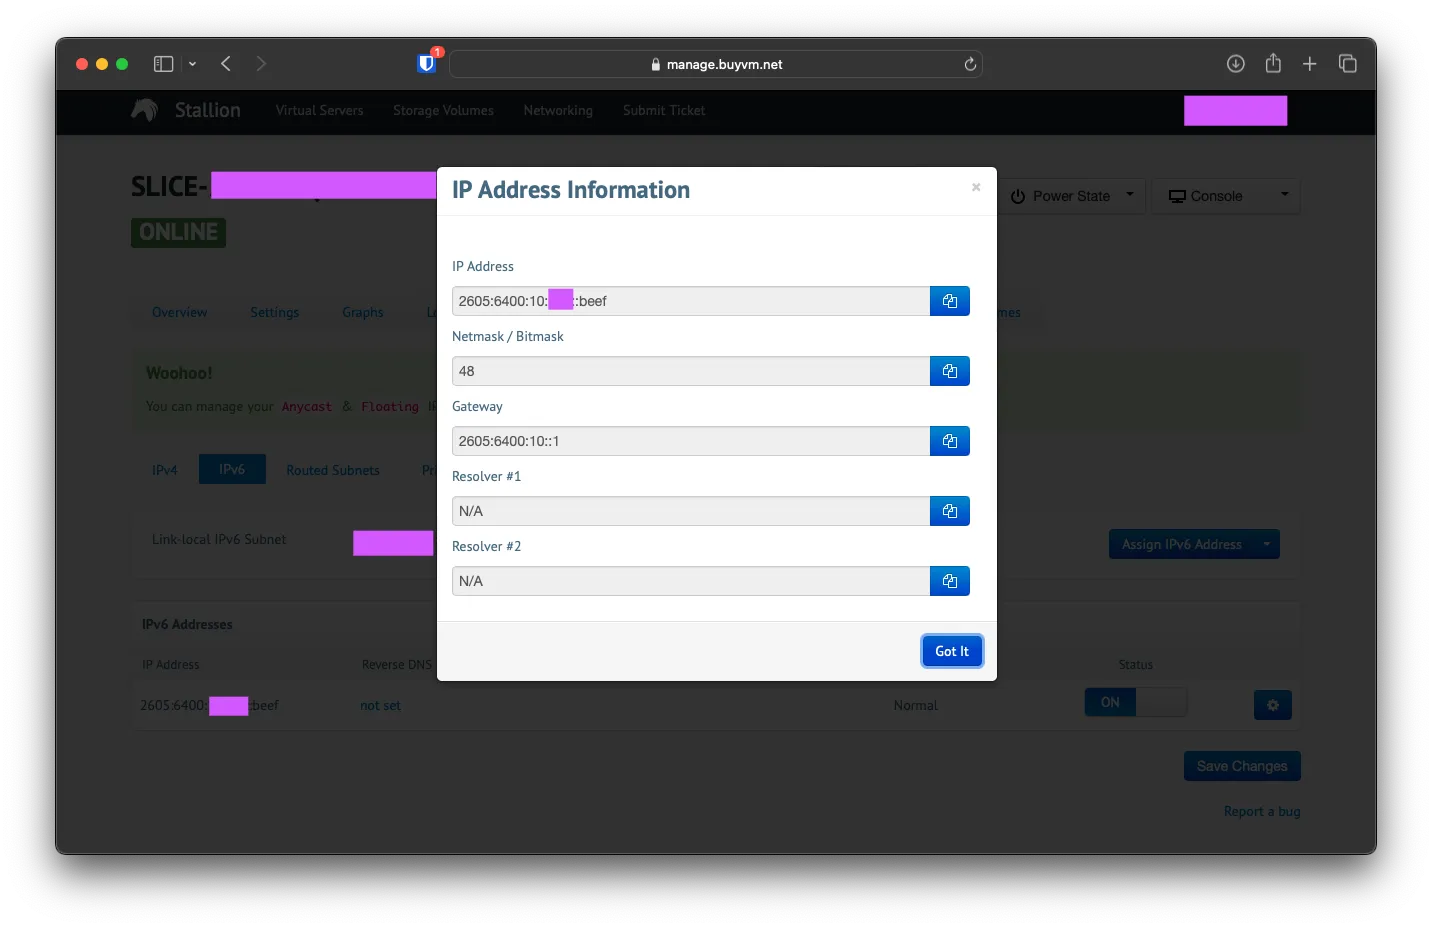
- 2001:4860:4860::8888To get the Address and the IPv6 Route, you can Gear beside the IP Address, Network Settings, and copy the setting from there. The same applies to the IPv4 one too.
Save the file /etc/netplan/01-netcfg.yaml, then reset the network setting with netplan apply
To fix this error3, you can change the /etc/netplan permission to 600 with the following command chmod 600 /etc/netplan/*.yaml
** (generate:716): WARNING **: 01:32:03.339: Permissions for /etc/netplan/01-netcfg.yaml are too open. Netplan configuration should NOT be accessible by others.
WARNING:root:Cannot call Open vSwitch: ovsdb-server.service is not running.

** (process:714): WARNING **: 01:32:03.593: Permissions for /etc/netplan/01-netcfg.yaml are too open. Netplan configuration should NOT be accessible by others.

** (process:714): WARNING **: 01:32:03.674: Permissions for /etc/netplan/01-netcfg.yaml are too open. Netplan configuration should NOT be accessible by others.

** (process:714): WARNING **: 01:32:03.674: Permissions for /etc/netplan/01-netcfg.yaml are too open. Netplan configuration should NOT be accessible by others.
To check IPv6 Routability, ping google.com with the ping6 command.
root@localhost:~# ping6 google.com
PING google.com(yyz10s20-in-x0e.1e100.net (2607:f8b0:400b:804::200e)) 56 data bytes
64 bytes from yyz10s20-in-x0e.1e100.net (2607:f8b0:400b:804::200e): icmp_seq=1 ttl=118 time=13.5 ms
64 bytes from yyz10s20-in-x0e.1e100.net (2607:f8b0:400b:804::200e): icmp_seq=2 ttl=118 time=13.5 ms
64 bytes from yyz10s20-in-x0e.1e100.net (2607:f8b0:400b:804::200e): icmp_seq=3 ttl=118 time=13.5 ms
64 bytes from yyz10s20-in-x0e.1e100.net (2607:f8b0:400b:804::200e): icmp_seq=4 ttl=118 time=13.5 ms
64 bytes from yyz10s20-in-x0e.1e100.net (2607:f8b0:400b:804::200e): icmp_seq=5 ttl=118 time=13.6 ms
^C
--- google.com ping statistics ---
5 packets transmitted, 5 received, 0% packet loss, time 4005ms
rtt min/avg/max/mdev = 13.497/13.541/13.594/0.032 ms
root@localhost:~#
Footnotes
-
FIRDAUS AHMAD’s blog on how to add IPv6 on BuyVM ↩
-
ask Ubuntu Page on how to fix Netplan issue ↩